Make dataset
Making the image dataset is tedious but important. High quality datasets are essential for building a highly performant models. For this tutorial we will use 500 hand sign image files. One hundred for each of rank 1, 2, 3, 4, and 5. Additionally, you will need 100 or more images that are not ranked.

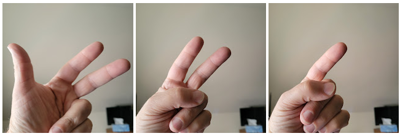
Example handsigns for 1, 2, and 3.
Image information
Each image will be a jpg file with a color resolution of 256x256. Each image will be labeled with the appropriate rank. In our case we allow only 1 rank per image. Labels are used to help identify components in your data which you want to train your model to identify in datasets that are not labeled.
Obtaining images
Set your camera to a low resolution (it will still be higher than 256x256) and a 1 to 1 aspect ratio. The aspect ratio gives a square image file. Take photos of the ranking handsigns. These photos should cover a wide range of image angles, hand positions, lighting conditions, different hands, various backgrounds, and varied additional context.
I take my photos on my smartphone and have them auto-upload into Google Photos. From there, I select the set of images and download to my computer as a zip file. Then I delete the images from my phone and Google Photos, to conserve memory.
Create a folder, ../datasets/rank, and unzip the images to this folder. Now use the Images library in julia to resize or otherwise transform the images.
Background image set
We also need a set of images that contain no ranking information. Use a variety of images that you already have to create this set. I place these into ../datasets/rank/not.
Julia code
Here is the image manipulation code used to extend the image library and to resize images.
using Images
using FileIO
using Glob

function resize_files(filelist, x=256, y=256)
    for item in filelist
        img = load(item)
        img = imresize(img, (x, y))
        save(splitext(item)[1] * "256x256" * splitext(item)[2], img)
    end
end

function hflip_files(filelist)
    for item in filelist
        img = load(item)
        img = reverse(img, dims= 2)
        save(splitext(item)[1] * "h" * splitext(item)[2], img)
    end
end

function vflip_files(filelist)
    for item in filelist
        img = load(item)
        img = reverse(img, dims= 1)
        save(splitext(item)[1] * "v" * splitext(item)[2], img)
    end
end
Extending image count
For this dataset, it should be easy to get the number of images you need for the classifier. For some datasets it is a challenge to have a sufficient set of data. In this case, it is possible to extend the images via reflection and rotation.
Flip horizontal
I put files to be flipped horizontally into ../datasets/rank/hflip. Now flip with this snippet,
img_path = "D:/datasets/rank/hflip"
filelist = glob("*.jpg", img_path)
hflip_files(filelist)
Flip vertically
I put files to be flipped vertically into ../datasets/rank/vflip. Now flip with this snippet,
img_path = "D:/datasets/rank/vflip"
filelist = glob("*.jpg", img_path)
vflip_files(filelist)
Sizing images
Now copy all images that you will use into ../datasets/rank/resize, to be resized. You should have at least 600 files at this point.
With all of the images in the denoted folder, use the following Julia snippet to resize them.
img_path = "D:/datasets/rank/resize"
filelist = glob("*.jpg", img_path)
resize_files(filelist)
Delete all files from this folder that are not 256x256.

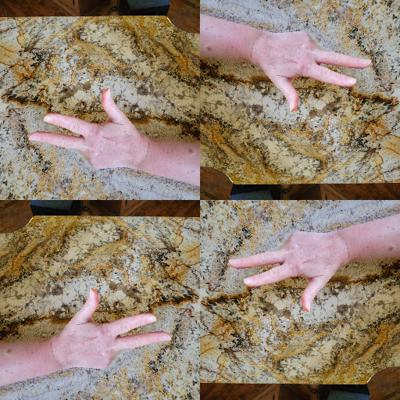
Example of flipped horizontally and vertically extending one image to four.
Labeling images
I use Label Studio or alternatively, CVAT. These are both open source project and there are others you can choose from.
Install Label Studio under Anaconda
conda create --name labelimg pipconda activate labelimgconda install -c anaconda urllib3pip install label-studioconda deactivate
Using Label Studio
Start Label Studio under Anaconda with the following
conda activate labelimglabel-studio start
The previous command should have stated a new browser window into the Label Studio interface. Now create an account and create a new project named Ranks. Once you have created the project, you import the image files into the project. Now open the project and select settings.
We need to set the Labeling interface, so select that tab and browse templates. The template we require is Computer Vision > Image Classification. As you can see, many different templates are available. Now remove the original label choices and add One, Two, Three, Four, Five, and None.
Back up to Projects / Ranks and click Label All Tasks. It should now step through the available unlabeled images. Choose the correct label and click save. Continue until all images are labeled.
Complete the labeling step
Finally, export a JSON file to our data directory. We will use this file later. Your image data set is now ready for usage.
Log out of and close Label Studio,
CTRL-cconda deactivate
Conclusion
At this point, you have created, expanded and appropriately resized an image dataset. Additionally, you have properly labeled the images and save a .json file that holds the labeled image data. Insure that the images and the .json file are in the folder named ../datasets/rank/resize.